How do I enter data into SPSS for central tendency and dispersion: In this article we are going to do this in a very easy way. It is So easy especially when you do this practically by your own.
| Summary | Enter Data | Analyze Data | Interpret Data | Report Data
Table of Contents
Let’s do with an example
Firstly, i am going to use this with an example which helps you to understand, how to enter data in Spss. you can see how i am doing this , then you can follow these steps with own unique data. Just change the data according to your data.
Now , Suppose i want to describe the age and height of 15 students in my class. Name and their age, height is given below.
| Name | Age | Height |
|---|---|---|
| Emily | 12 | 4’8″ |
| Jacob | 14 | 5’2″ |
| Madison | 13 | 5’0″ |
| Ethan | 11 | 4’10” |
| Olivia | 12 | 4’9″ |
| Michael | 15 | 5’5″ |
| Ava | 10 | 4’6″ |
| William | 13 | 5’1″ |
| Sophia | 12 | 4’11” |
| Alexander | 14 | 5’3″ |
| Emma | 11 | 4’7″ |
| Jayden | 12 | 4’10” |
| Isabella | 13 | 5’0″ |
| Daniel | 10 | 4’5″ |
| Mia | 14 | 5’0″ |
This table provides a variety of ages and heights to reflect the diversity among students.
Some steps to calculate measures of central tendency and dispersion using SPSS
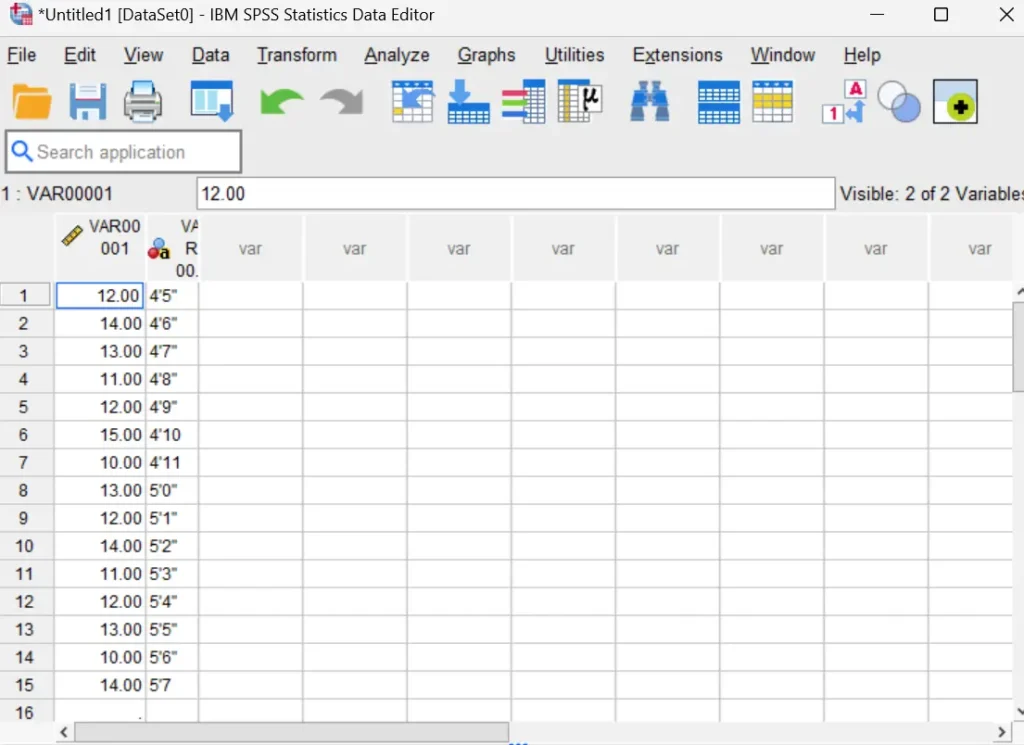
Step 1. Enter all ages into the first column of cells and the height in Second column of cells.
Simply type in each age and hit the enter key. Every time you hit enter, the cursor will move to the next cell below automatically the one you are currently working in.

entering data in spss for mean mode median
Step 2. Naming your variable in data table
It is very important to gave the name to the variable to the data. which helps us to keep track of them later on when we are going to analyze. Believe me, it is a fantastic idea.
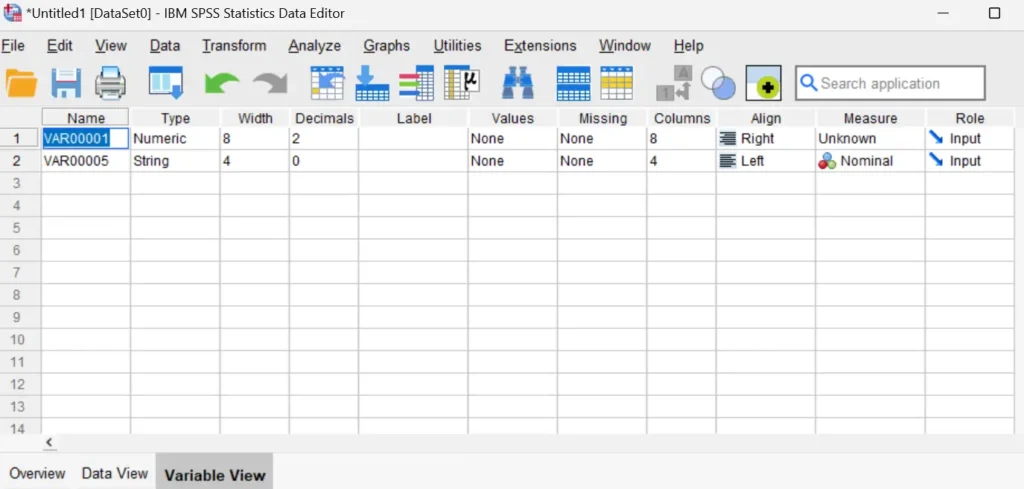
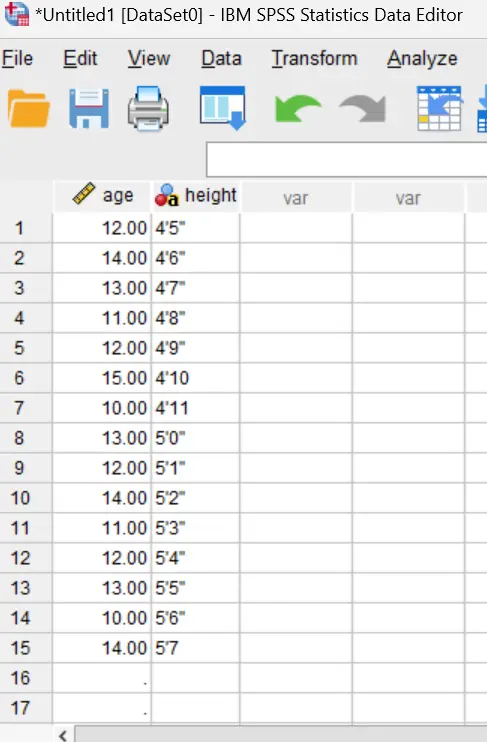
Your current variable name is appearing at the top of the column of data. In this photo you can see the name ‘ VAR00001’ for age and ‘VAR00005’ for height. You have to gave it a better name that helps to rembember it easily. In my case i am putting the name of variable as ‘age’ and ‘ height’.
To rename your variable, double click on the box that says var00001.
Step 3. A New Define Variable window will appear
This new window box will help you to edit the name of variable. Look in the Variable Name box. You can see that right now, the variable name is still VAR00001 and VAR00005.

Giving our variable a meaning full name
Enter a different name in the box to modify the name. Make sure the name accurately describes your variable and has meaning for you. I will call my variable Age because I am providing an example with age data. SPSS will impose restrictions on the quantity and kind of characters you can enter.
This means that if your variable name is too long, SPSS may occasionally alert you to this. When this occurs, remove some letters from your variable name, such as the vowels.
Occasionally, SPSS may prevent you from using specific characters, such as the $ symbol. Simply remove those characters and try something different when this occurs.
Check this your variable names changed

Other options
You can see that there are a few other options in the Define Variable box. These include choosing a scale of measurement and changing some settings.
We won’t worry about these options right now. When you are finished renaming your variable, click the OK button.
Finally, we did it
finally , we have successfully entered our data for analyzing for central tendency and dispersion. But wait a minute, most of the students thinks that they had completed the work by changing the name of variable. There is one last things to do , that is very important..
Save your data File in our computer
One thing always keep in mind save the file into your system before the system analysis. The reason is Because SPSS always makes two files , one for your raw data and One for the results of you data analysis.
Some students loses their unsaved files data when they analyze their data. Don’t let this happen to you.
Save your data to a Right place in your computer!
Data can be easily saved.
At the upper left of the screen, select “File.” Next, select “Save As.” You can choose where you want the data to be saved on your computer.
Select an option that will remain accessible to you in the future and holds significance for you. For instance, a disk would be the greatest place to save your data if you are a student using a university computer facility.
If you are using a university computer without a disk, save the file to your desktop and send yourself an email with it. Save the data file to a temporary folder if you are using a home computer.
Save your data with a meaningful name
Give a memorable name to your data file so you can recall it later. Students frequently use the same data file repeatedly to perform a variety of studies. Make sure the name of your data file means something to you now. Above all, make sure the name you give your data file will signify something to you down the road. You may choose to name your data file “Age” if you are dealing with Age data. This is really evident.
File extension
Your data file will be given an extension. This is always something that goes at the end of your file name. It will help you in the future if you are trying to determine what type of file you are looking at. SPSS always uses different file extensions for data files and files for the results, called output files The file extension that SPSS should give you for a data file is ‘.sav.’ So, if you have saved an Age file, it’s official name will be Age.sav.
Make sure your file is saved
Finding out if your file has been saved is simple. Simply glance at the upper left corner of the display. The name you choose will show up there if your file has been successfully saved. Look at the name Age in the upper left corner of the image below? This indicates that the name Age has been preserved with my file.